注意
前往結尾以下載完整的範例程式碼。或通過 Binder 在您的瀏覽器中執行此範例
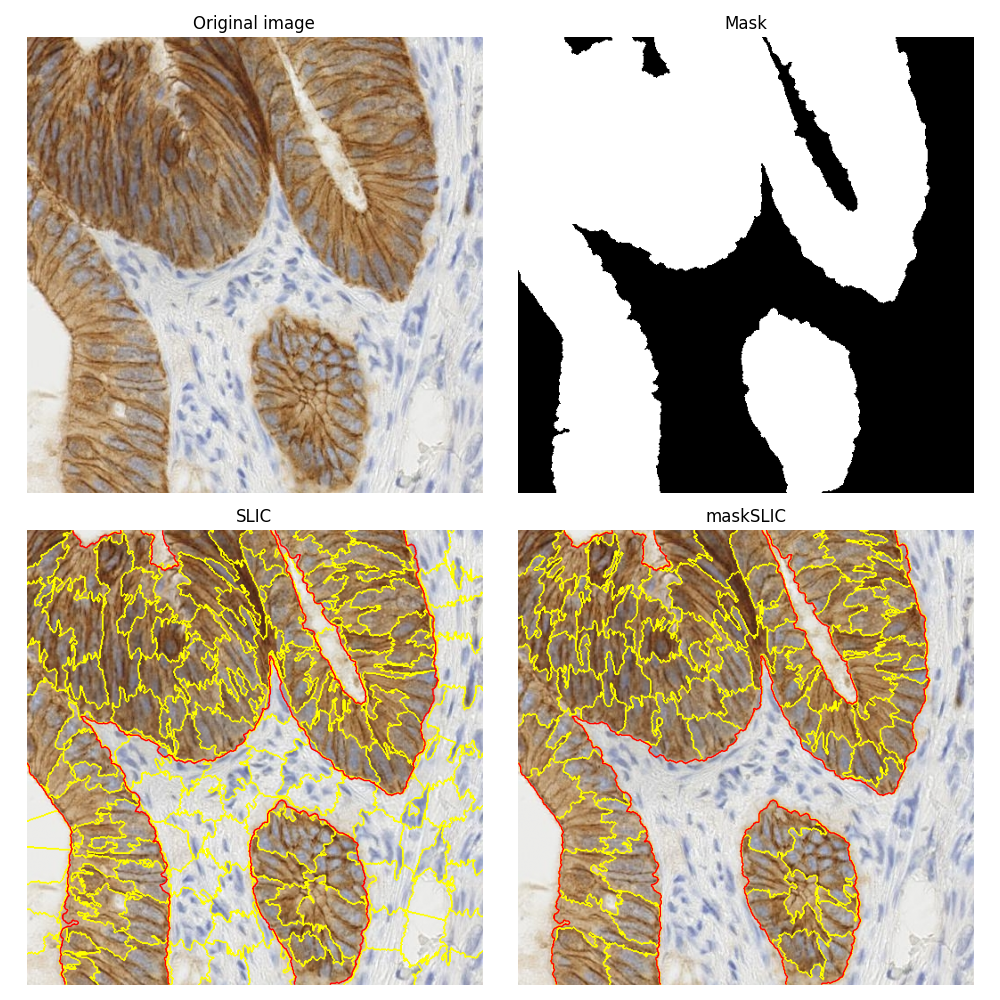
應用 maskSLIC vs SLIC#
此範例是關於比較使用普通 SLIC 方法 [1] 和其遮罩版本 maskSLIC [2] 獲得的分割結果。
為了說明這些分割方法,我們使用一張帶有免疫組織化學 (IHC) 染色的生物組織影像。在關於如何分離免疫組織化學染色中的顏色的範例中使用了相同的生物醫學影像。
maskSLIC 方法是 SLIC 方法的擴展,用於在感興趣的區域中產生超像素。maskSLIC 能夠克服影響 SLIC 方法的邊界問題,尤其是在不規則遮罩的情況下。
import matplotlib.pyplot as plt

from skimage import data
from skimage import color
from skimage import morphology
from skimage import segmentation

# Input data
img = data.immunohistochemistry()

# Compute a mask
lum = color.rgb2gray(img)
mask = morphology.remove_small_holes(
    morphology.remove_small_objects(lum < 0.7, 500), 500
)

mask = morphology.opening(mask, morphology.disk(3))

# SLIC result
slic = segmentation.slic(img, n_segments=200, start_label=1)

# maskSLIC result
m_slic = segmentation.slic(img, n_segments=100, mask=mask, start_label=1)

# Display result
fig, ax_arr = plt.subplots(2, 2, sharex=True, sharey=True, figsize=(10, 10))
ax1, ax2, ax3, ax4 = ax_arr.ravel()

ax1.imshow(img)
ax1.set_title('Original image')

ax2.imshow(mask, cmap='gray')
ax2.set_title('Mask')

ax3.imshow(segmentation.mark_boundaries(img, slic))
ax3.contour(mask, colors='red', linewidths=1)
ax3.set_title('SLIC')

ax4.imshow(segmentation.mark_boundaries(img, m_slic))
ax4.contour(mask, colors='red', linewidths=1)
ax4.set_title('maskSLIC')

for ax in ax_arr.ravel():
    ax.set_axis_off()

plt.tight_layout()
plt.show()
腳本的總執行時間: (0 分鐘 2.356 秒)